

1. Start Chat
Once TermMate is installed, open a chat session from within your editor.Sublime Text
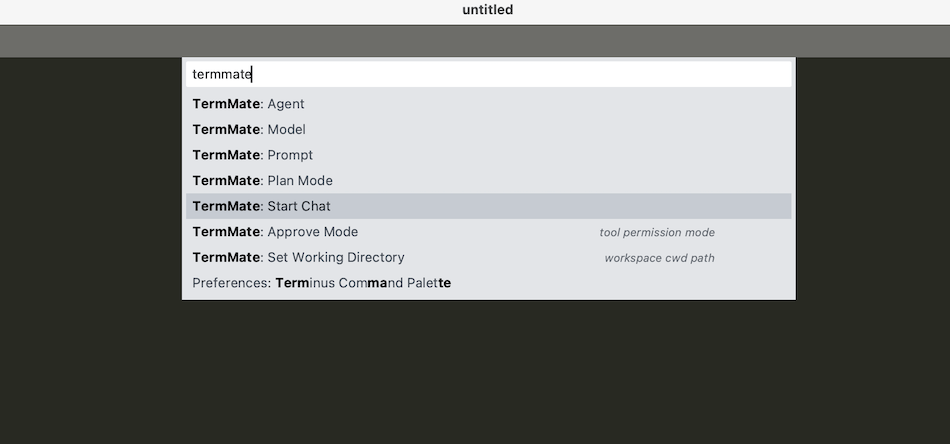
- Open the Command Palette (
Cmd+Shift+Pon macOS,Ctrl+Shift+Pon Windows/Linux). - Type
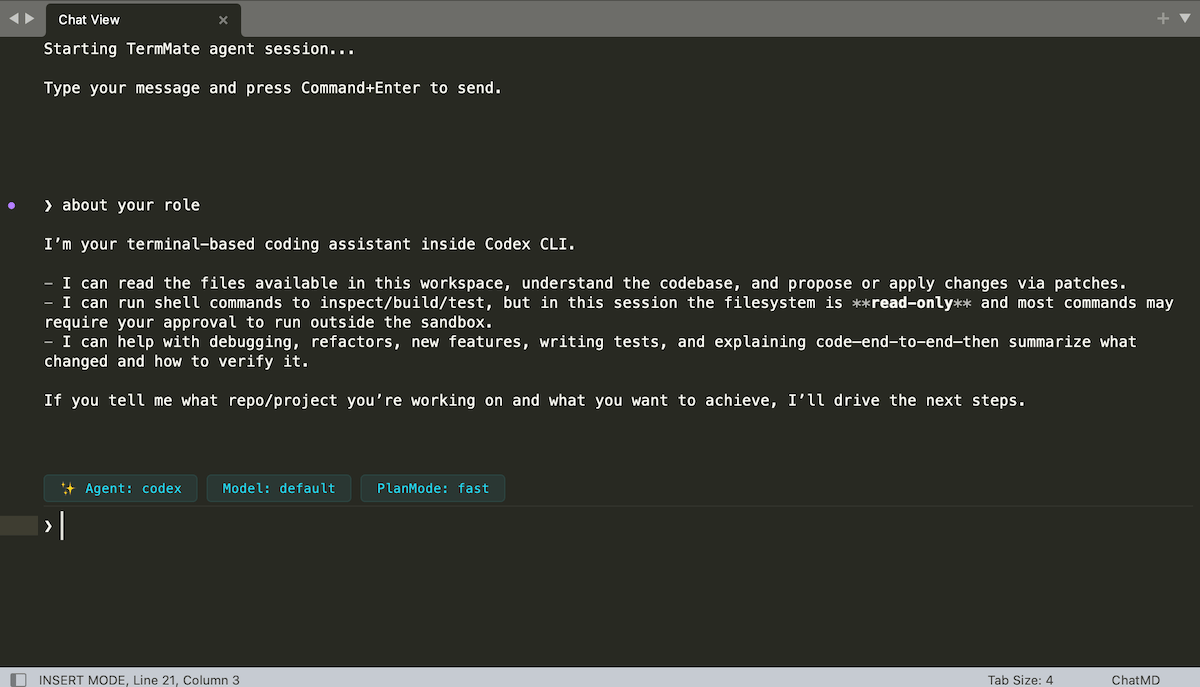
TermMate: Start Chatand pressEnter. - A new view will open for the TermMate chat.
- Type your message and press
Cmd+Enter(macOS) orCtrl+Enter(Windows/Linux) to send. You can even edit prompts in Vim mode.
VS Code
You can start a chat session in two ways:- Status Bar: Click the TermMate item in the bottom status bar.
- Command Palette: Open the Command Palette (
Cmd+Shift+Pon macOS,Ctrl+Shift+Pon Windows/Linux) and runTermMate: Start Chat.
2. Select Agent
When initiating a chat session, TermMate presents a native selector interface to choose your preferred underlying AI agent:- Sublime Text: You can switch your active agent by clicking the Agent button located directly above the chat input area inside the chat view tab. This opens a selection list panel to choose your desired agent.
- VS Code: You can select or switch your active agent directly via the dropdown menu located at the bottom of the chat input area inside the Webview tab. Additionally, the bottom editor Status Bar displays the current active agent and model (e.g.
▣ claude(default)).
Supported Agents
- Claude Code: Powered by Anthropic’s terminal agent. Highly recommended for advanced reasoning, complex multi-file generation, and deep workspace context understanding.
- Codex: Powered by OpenAI’s coding companion. Excellent for precise low-latency edits and interactive codebase exploration.
- OpenCode: Powered by Anomaly. Open-source agent supporting multi-model backends, interactive code editing, and server-managed session state.
- Pi Agent: Powered by Earendil (pi.dev). A lightweight, extensible coding agent supporting multiple model providers.