

1. Install TermMate
Sublime Text
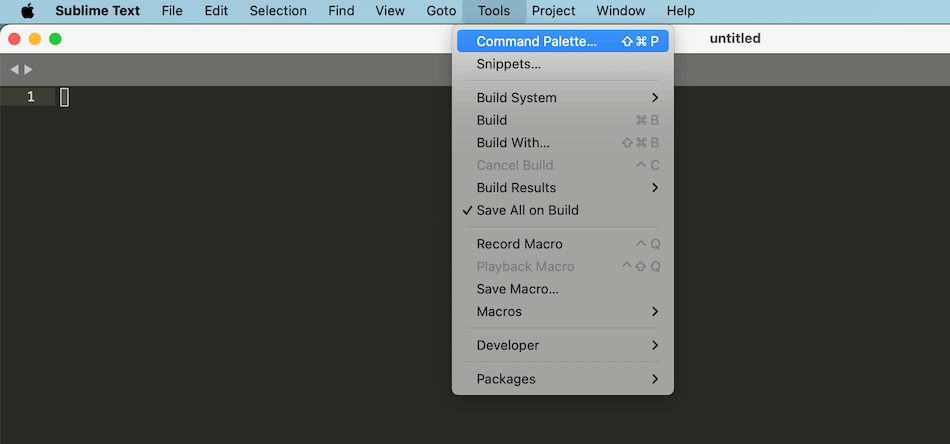
- Open the Command Palette (
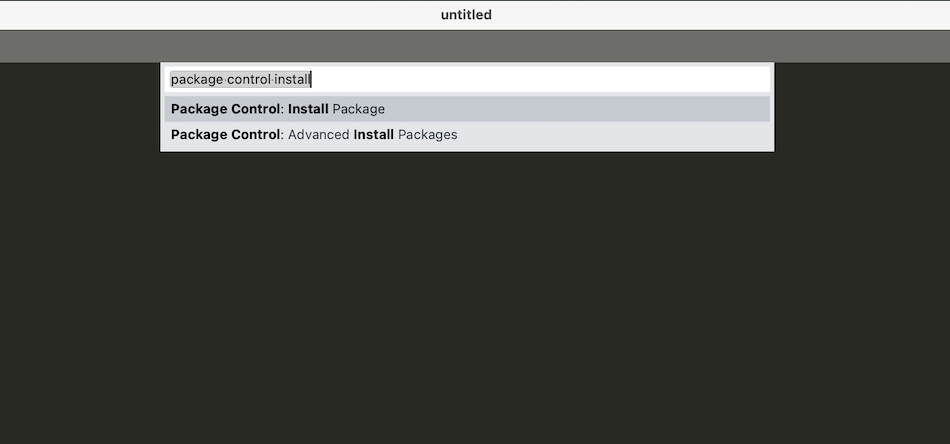
Cmd+Shift+Pon macOS,Ctrl+Shift+Pon Windows/Linux). - Type
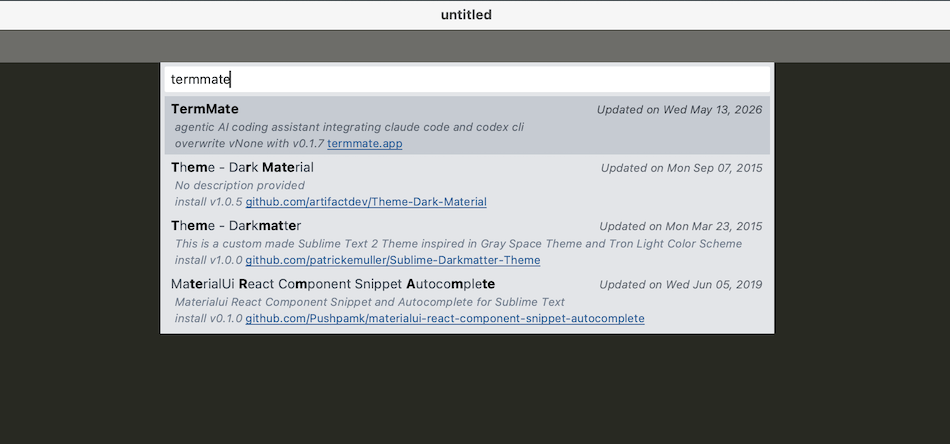
Package Control: Install Packageand pressEnter. - Search for
TermMateand pressEnter.
Manual installation
If you cannot use Package Control, install TermMate manually from GitHub Releases:- Download
TermMate.sublime-packagefrom the latest release. - Copy
TermMate.sublime-packageinto your Sublime Text Installed Packages directory:- macOS:
~/Library/Application Support/Sublime Text/Installed Packages/ - Windows:
%APPDATA%\Sublime Text\Installed Packages\ - Linux:
~/.config/sublime-text/Installed Packages/
- macOS:
- Restart Sublime Text.
VS Code
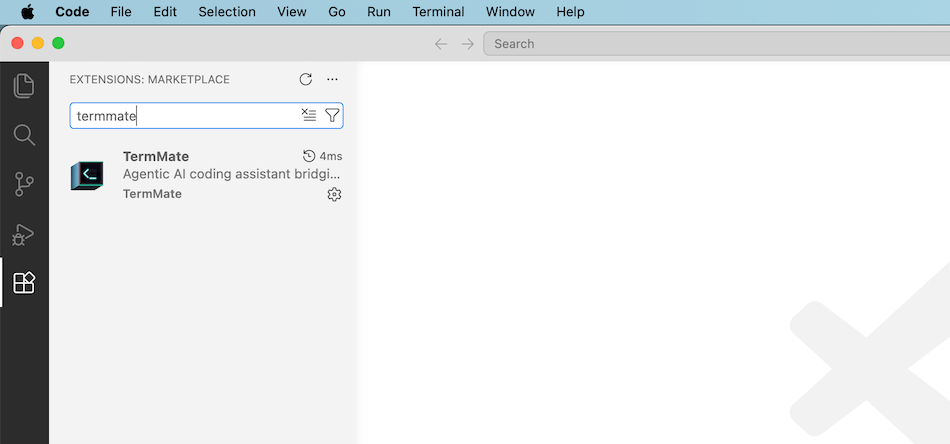
Install TermMate from the Visual Studio Code Marketplace: marketplace.visualstudio.com → TermMate Or search TermMate directly in the VS Code Extensions panel (Cmd+Shift+X).
2. Install Agent CLI
The easiest way to install an agent is directly from within your editor: open the Command Palette, typeTermMate: Install Agent, and select the agent you want. TermMate will run the installation in a dedicated panel and notify you when it’s complete. You can also run TermMate: Install Agent at any time later to add more agents.
Or install manually from your terminal:
Claude Code (Recommended)
Claude Code is Anthropic’s official terminal-based coding agent.Codex
Codex is OpenAI’s coding agent.- macOS / Linux
- Windows
OpenCode
OpenCode is an open-source terminal AI coding agent by Anomaly.- macOS / Linux
- Windows
Pi Agent
Pi Agent is an extensible terminal coding agent harness by Earendil (pi.dev) supporting multiple model providers.TermMate automatically detects CLI installation paths across multiple environments, including Homebrew, npm-global, Yarn, and common local binary directories. You typically don’t need to manually configure environment variables or search paths.
3. Authentication
TermMate supports two authentication methods depending on your account and workflow:Option 1: Terminal Login (OAuth / Subscriptions)
If you use a subscription (such as Claude Pro/Team or ChatGPT Plus), authenticate once in your terminal before starting a session in TermMate. TermMate will automatically inherit the session credentials.Claude Code
Codex
OpenCode
Launch OpenCode in your terminal and connect your provider:Pi Agent
Launch Pi in your terminal to log in:Option 2: Custom Environment Variables (env)
If you want to use custom endpoints, third-party proxies, or API keys directly, configure the env object in TermMate’s settings:
- Sublime Text:
Preferences → Package Settings → TermMate → Settings - VS Code:
Settings → Extensions → TermMate(orsettings.jsonunder"termmate.env")
Route Claude Code via OpenRouter
Gemini API Key for OpenCode
If you previously authenticated OpenCode via terminal login and want to switch to API key auth, remove
~/.local/share/opencode/auth.json before restarting.