1. Select an Agent
TermMate supports four agent backends. Switch between them using the agent selector in the chat panel.Sublime Text
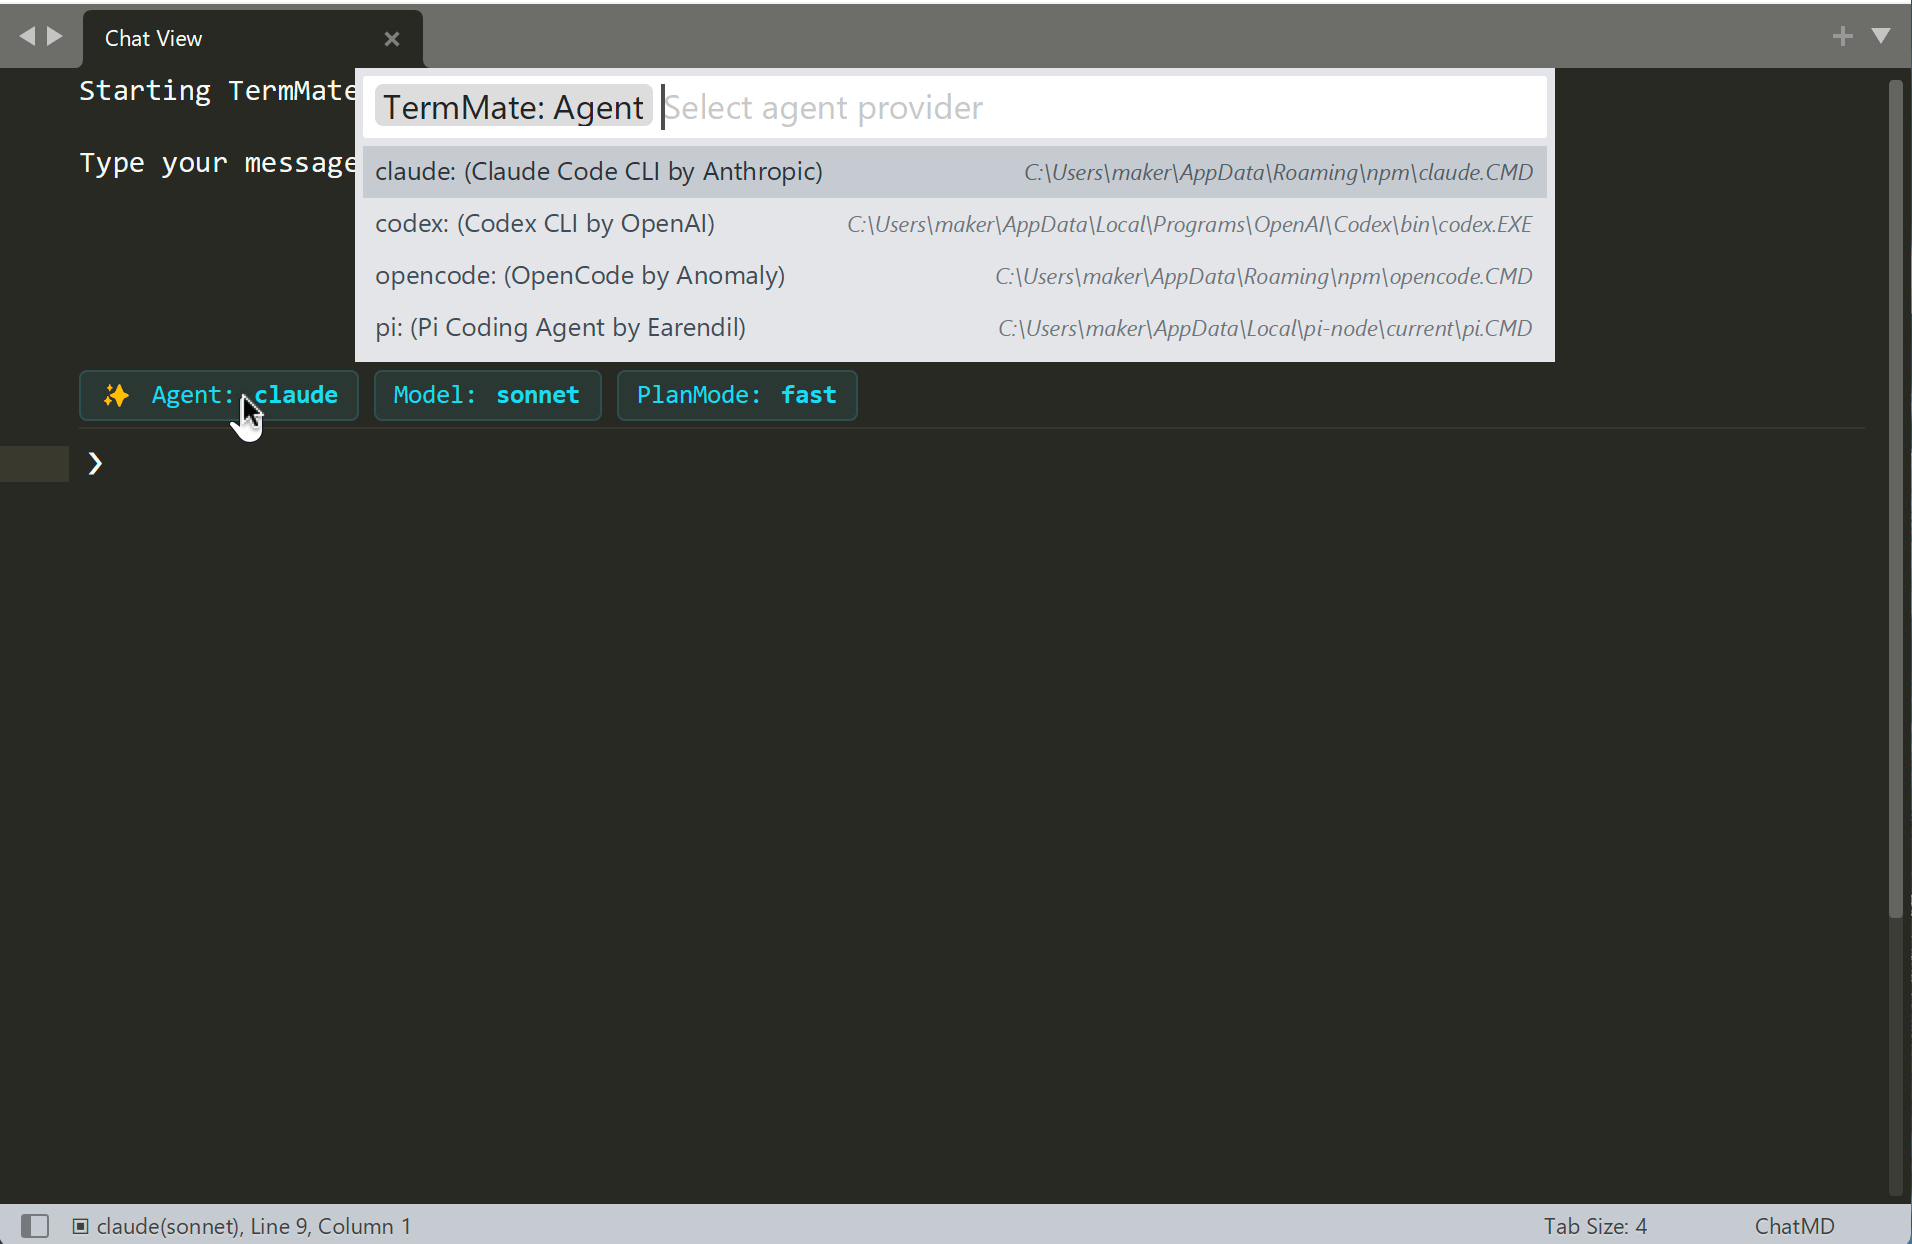
TermMate: Agent from the Command Palette. Each entry shows the detected CLI path as an annotation so you can confirm which binary will be used. The choice is stored per window and persists with your project.
To set a model per agent, click the Model tag above the chat input or run TermMate: Model. Models are remembered separately for each agent (e.g. gpt-5.4 for Codex, google/gemini-3.1-flash for Pi).
TermMate automatically searches common binary paths across your environment (e.g., ~/.opencode/bin/opencode, ~/.local/bin/pi, ~/.npm-global/bin/). To override the detected binary path for any agent, set <agent>_command in your TermMate settings:
VS Code
Use the AGENT dropdown in the chat input panel. Your selection is remembered per workspace.2. Tool Use Permissions
Agents are “agentic” because they call tools. Before any destructive action, TermMate asks for your approval:- File Edits — review a diff before changes are written to disk.
- Terminal Commands — see the exact shell command before it runs.
- Bash / MCP tools — approve or deny individual tool calls inline.
TermMate: Approve Mode):
default— prompt before every tool action.allow-edit— auto-approve safe read and edit operations, while still prompting for shell commands.accept-all— auto-approve everything, including shell execution.
3. Plan Mode
For complex tasks, enable Plan Mode so the agent reasons before it acts:- The agent analyzes the task and writes a detailed step-by-step plan.
- You review the plan before anything is executed.
- The agent carries out each step with your oversight.
Sublime Text
Toggle Plan Mode per session by clicking the PlanMode tag above the chat input, or runTermMate: Plan Mode from the Command Palette: choose planning (make plan and todo-list before execute) or fast (execute directly, the default).
VS Code
Use the plan mode selector in the chat panel: chooseplanning (make plan and to-do list before executing) or fast (execute directly).
Under the hood, TermMate maps Plan Mode to each agent’s native mechanism:
4. Split Chat Window & Dedicated Pane
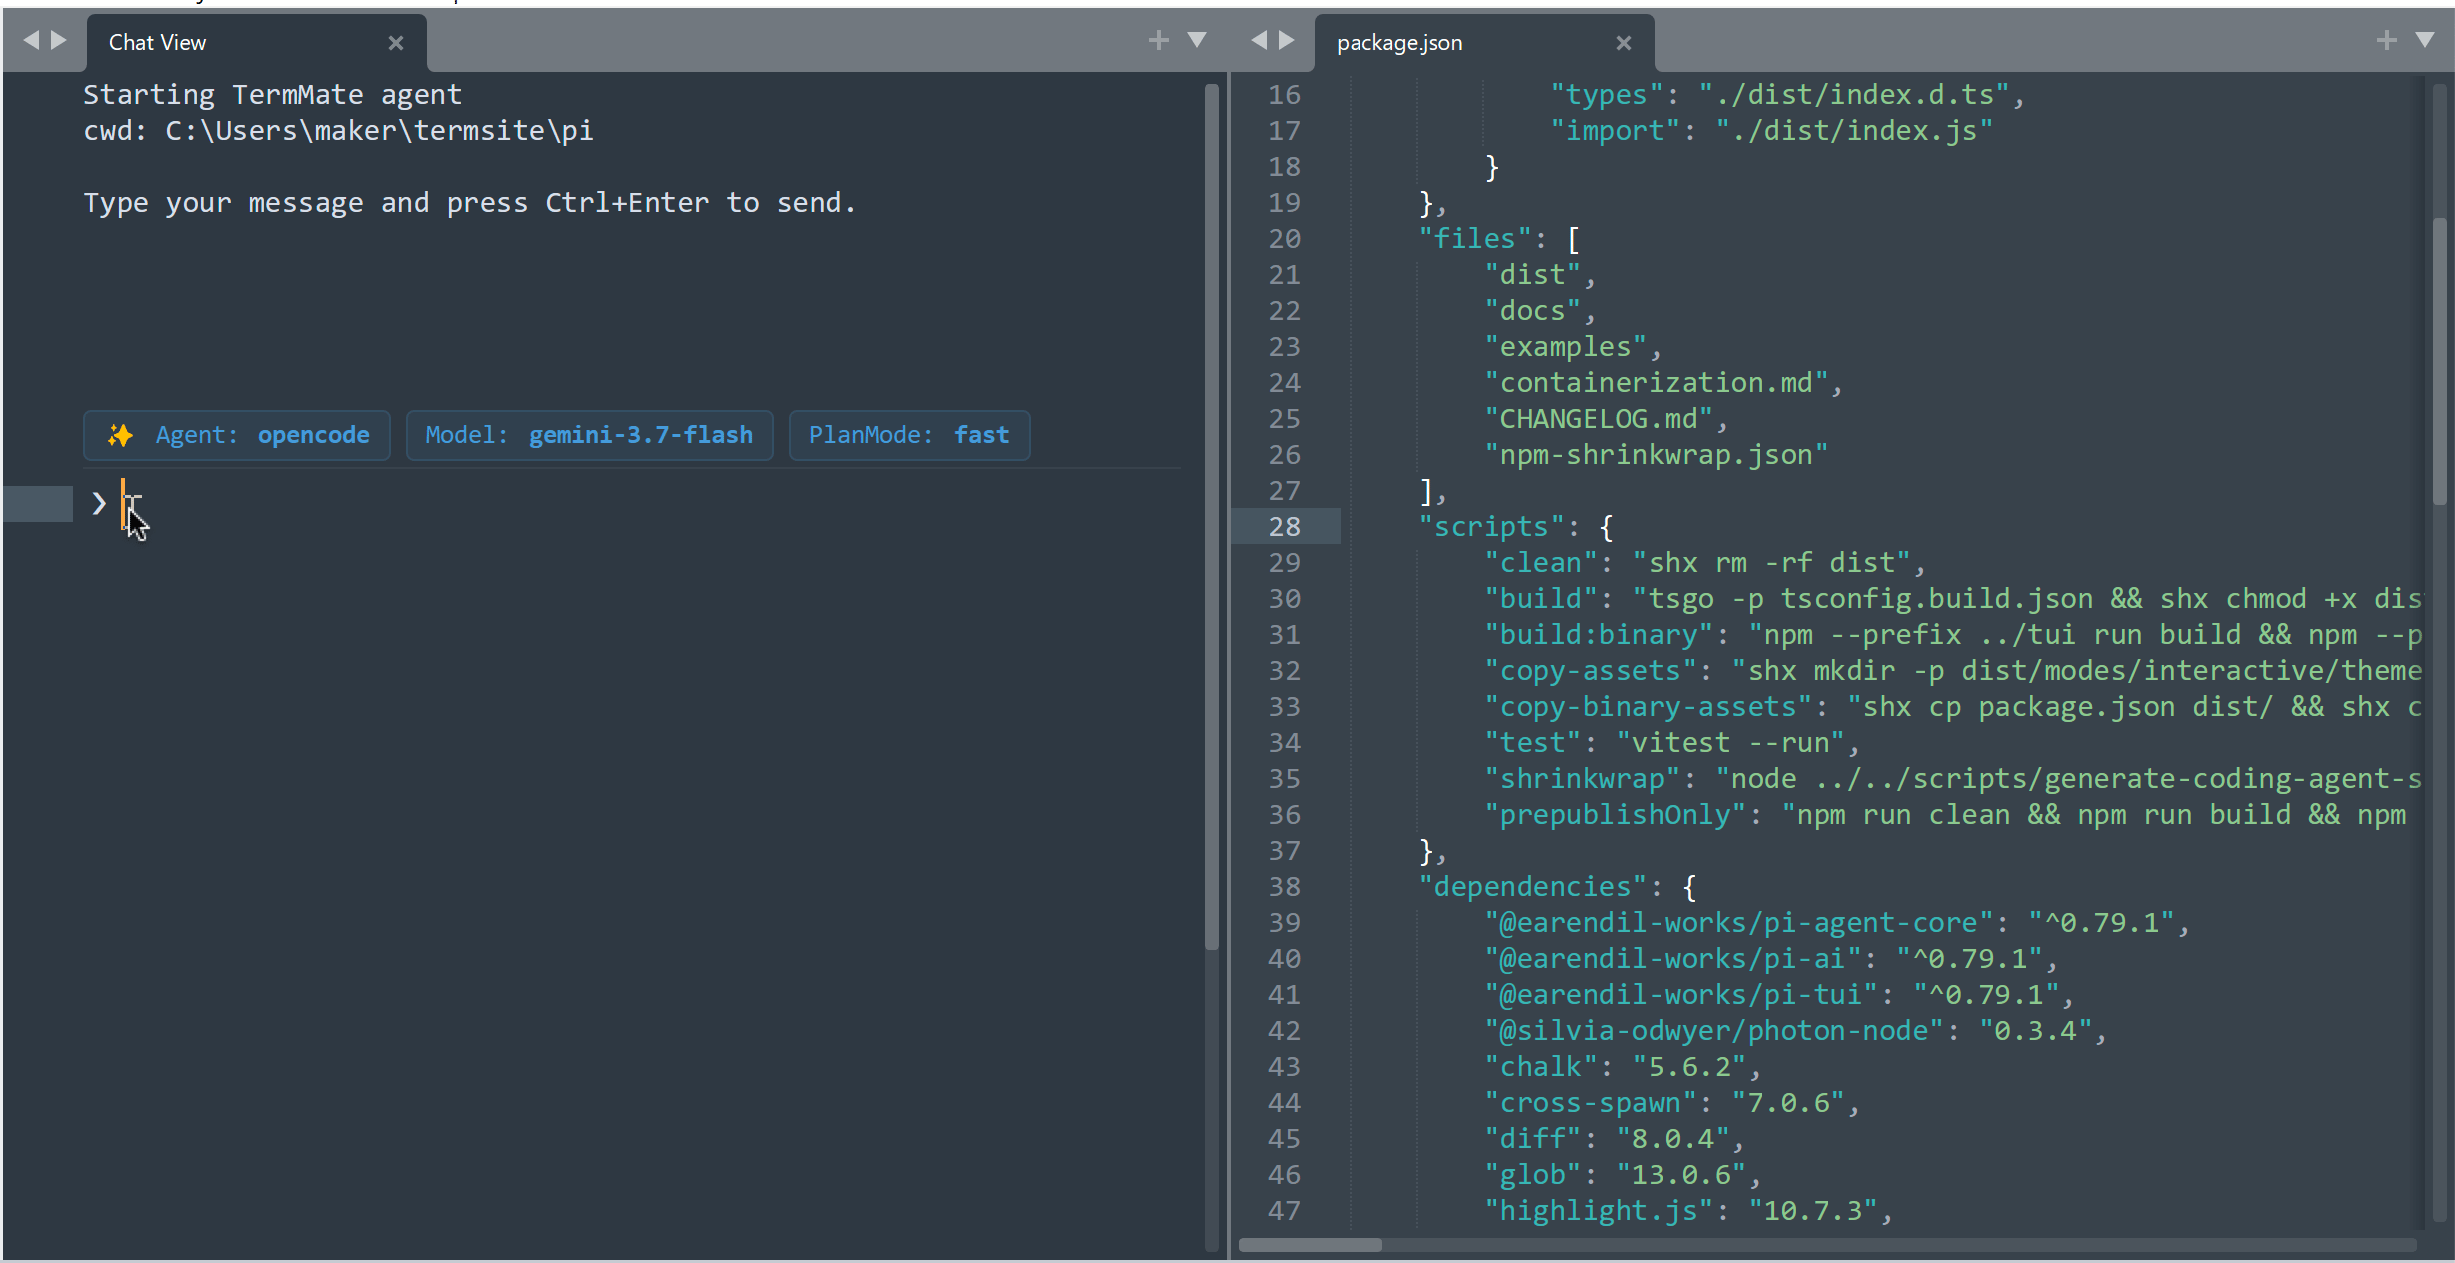
Keep your code and agent chat side-by-side: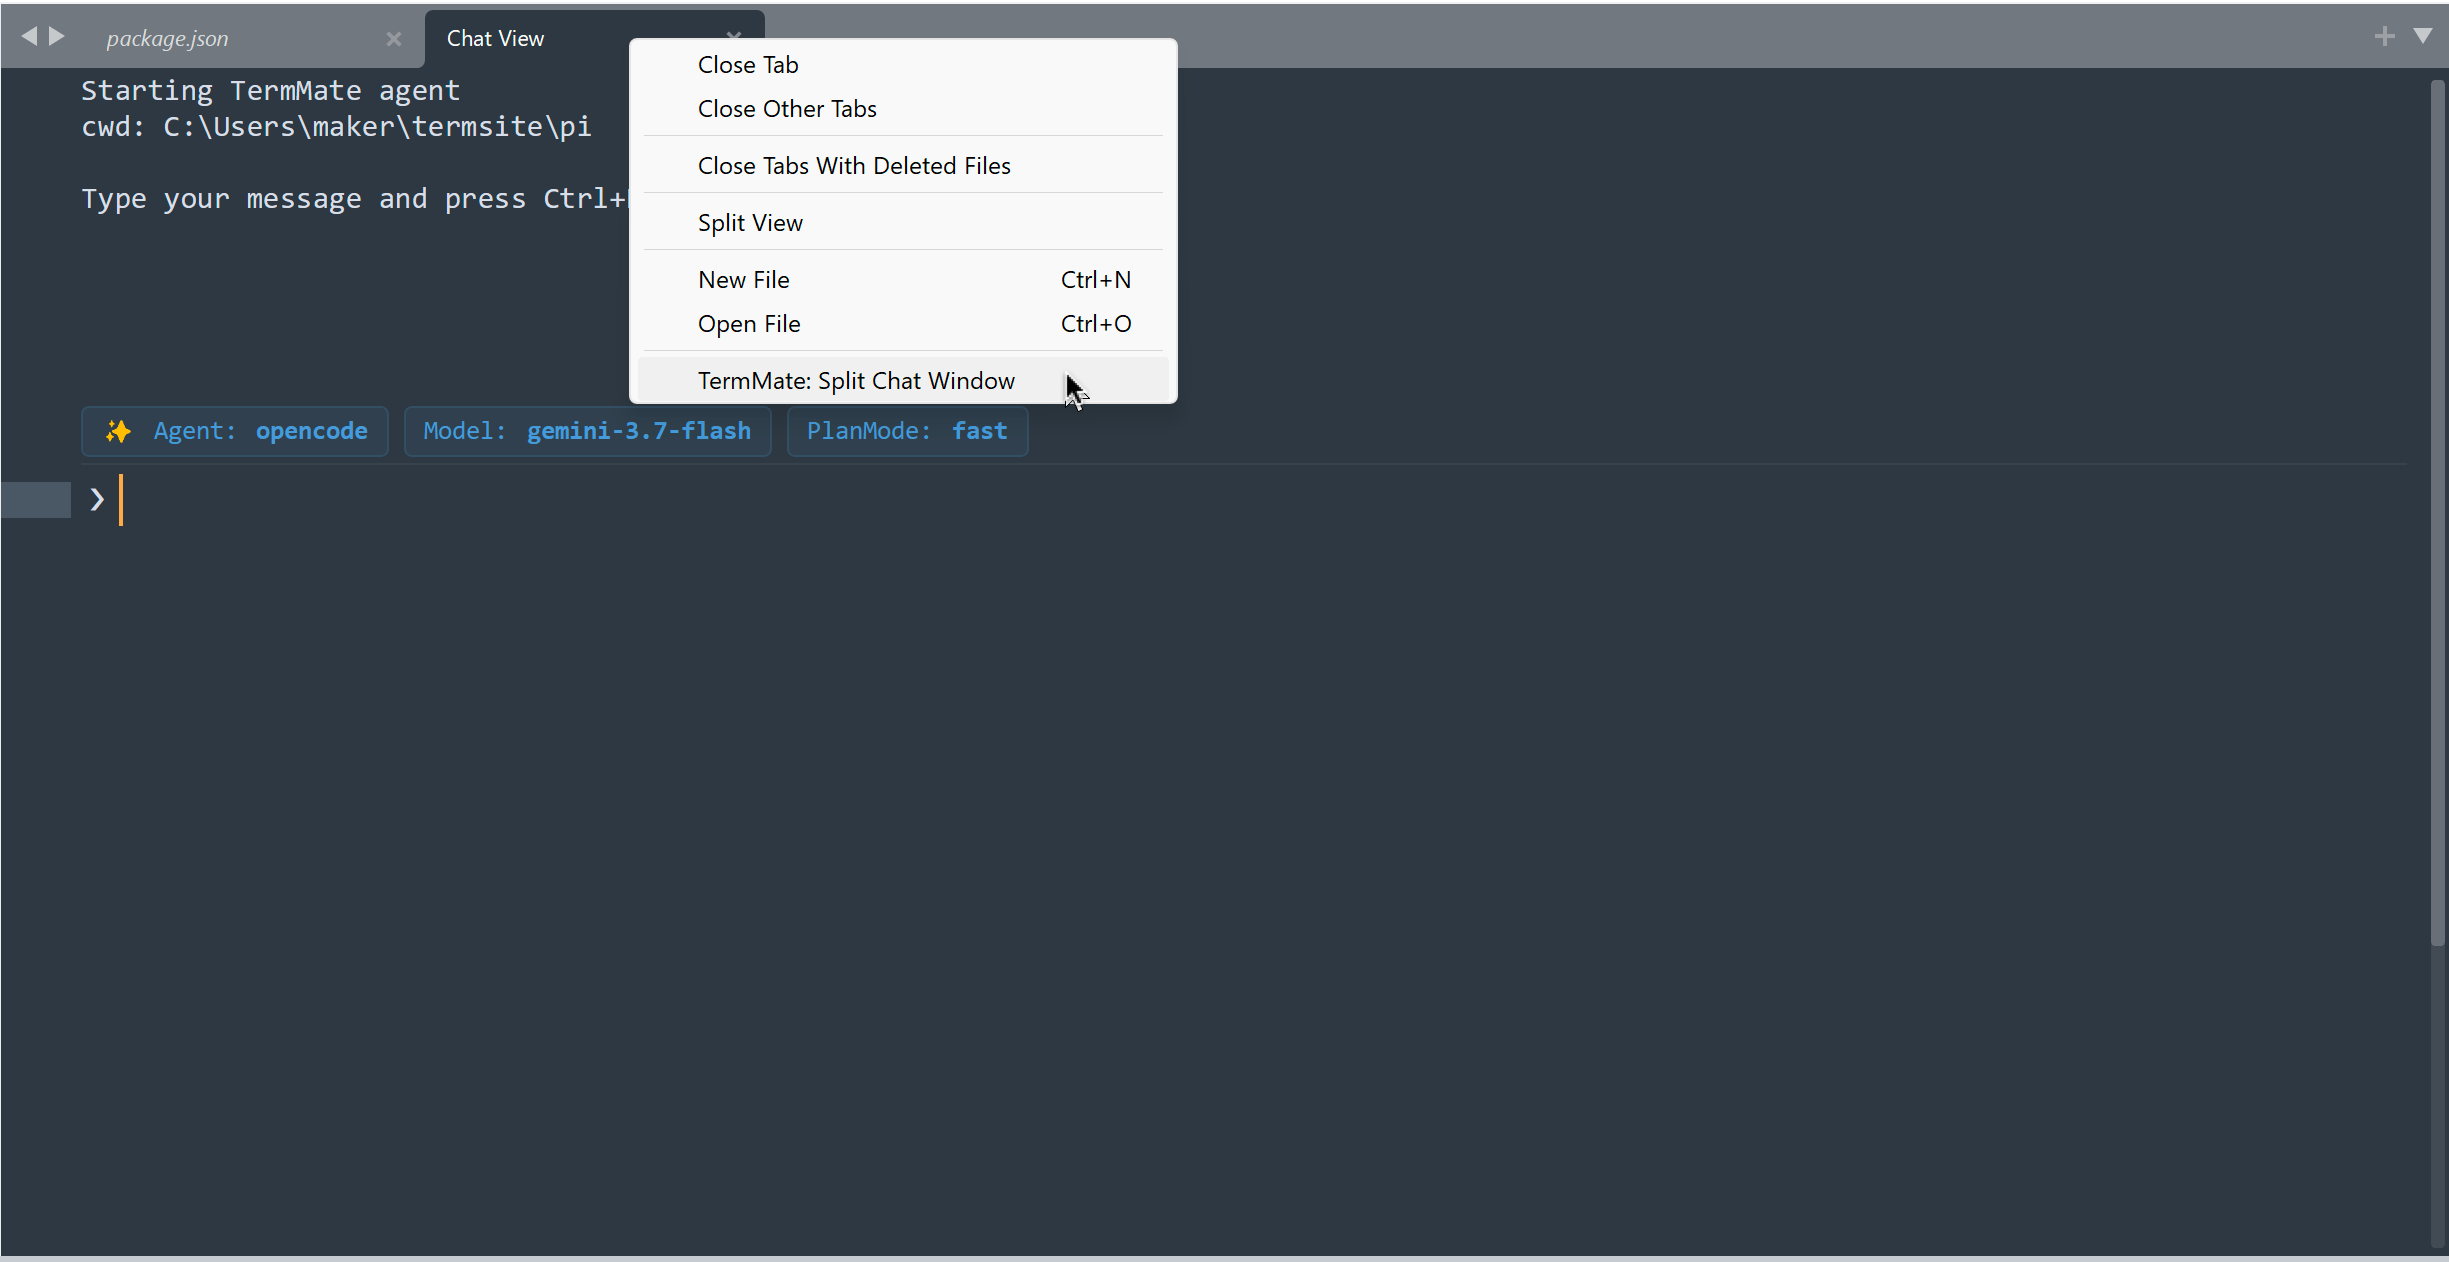
- Run
TermMate: Split Chat Windowfrom the Command Palette, or right-click the chat tab and select TermMate: Split Chat Window. - TermMate sets up a dedicated pane layout.
- The
dedicated_chat_panesetting (defaulttrue) ensures files opened elsewhere in the editor will never replace or overwrite the chat view tab.